>
DIY
Showing posts with label DIY. Show all posts

Tutorial: toilet paper pincushion

Wednesday, December 21, 2011


I love handmaid treasures. Someone's love, thought and hard work transformed into a finished keeper. The unique things that you won't find in the store bin, multiplied by one thousand. The imperfect item, not made by a machine but diligent hands. Progress and modernization have their place, but the uniqueness of the handmade still holds its value.

However, when it comes to my handmade products, I get lazy. I think love and thought is good, but hard work? Who wants more handmade hard work when you are already hand cooking, hand cleaning, hand picking toys, hand folding clothes...?

So here is a craft, as easy as it gets to transform an ugly toilet paper roll into a pincushion. It will take 5 minutes and you will have a handmade treasure! Enjoy!

You will need a roll, a twine and a piece of fabric big enough to be folded inside the roll
Place the roll on top of the wrong side of the fabric
Tuck as deep as you can inside the toilet roll the corners of the fabric moving clockwise
Use the twine to keep everything in place. Place your scissor inside the central hole and your pins inside the toilet paper.

Disclaimer: in no circumstance try to use this roll in the bathroom before removing the pins!
Read More

The sugar that sticks you in!

Tuesday, December 13, 2011

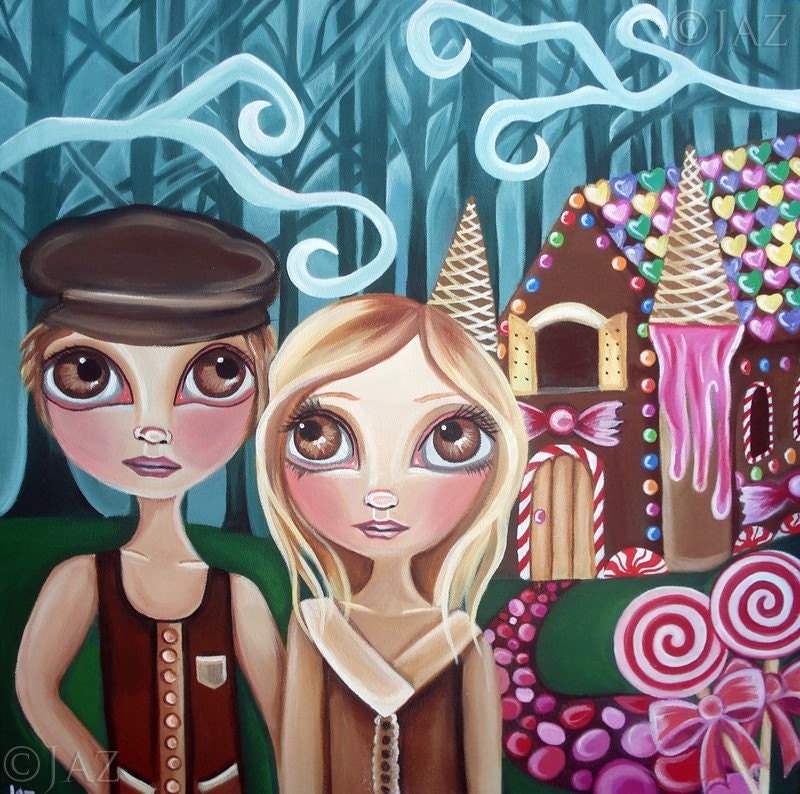
Print sold here 
Gingerbread house. Sweet view. Sticky fingers. Rainbow of colors. A popular winter tradition that I wanted to share with the boys this year.

First step was to pretend I was going to make one from scratch. After reading many Martha Stuart tutorials, I gave up. It sounded like lots of work. So I went the easy way, I decided to buy a kit. I did not want to spend too much money and preferred something that was also healthy. At the end, I ended up giving up the healthy requirement in favor of a cheap one. I decided we were going to use it only as a craft, like play dough. No eating allowed. I was not in favor of my kids ingesting an entire selection of artificial colors that could mix up inside them producing some hipper active hue!

Next step was to transform the broken gingerbread tablets (duo to Luke constantly dropping the box in the store as he wanted to carry it) into a house. A little difficult, but doable. The hard part was to do that and answer two questions a minute. After some struggling, we got that part done and went to sleep.

Today it was the final and glorious day of decorating the house. That meant keeping the kids from eating all the candy before they landed in the house. I can see why Hansel and Gretel could not resist the candy house temptation. I just don't understand why the witch did not care for her own sugar treats, and wanted fat baked boys instead (what a terrible fairly tale! no publisher today would accept such an idea!)

Anyway, we all survived the gingerbread house tale and did not get lost in the forest. Maybe lost in dreams, as my two little boys now dip their heads in soft pillows and fairy tales.

"This finger is not chubby enough!"


Read More

10 Sips for the Weekend: Reuse

Friday, December 2, 2011


I have made the Internet my personal shopper. I tell it what I want, handle my credit card and receive the goods at home. I hardly drive anywhere to shop after moving to Hoboken, as it is a work on itself just to get the kids in and out of the car: kids in the stroller, get the elevator, walk out of two doors, walk 2 blocks, open another 2 doors, get another elevator, out of the stroller, in the car. And on the way back everything repeats in reverse plus balancing the bags that hang from every corner of the stroller.

That is the easy way in and out. The hard one involves a child complaining because he forgot his toy, a child sleeping while the other cries, snacks containers, gloves and hats flying away from the stroller in every direction. So online shopping sounds very tempting. Take Luke to school, Mark for a nap, grab a piece of chocolate and head to the computer for a relaxing experience!

But with the online shopping comes the packaging that can take over your house if you are not fast enough in the recycling department. Boxes, plastic wraps, brown papers, bags. A lot of times I feel guilty that my green habit of not driving is not so green with so much garbage as a result. So I am trying to make good use of the extras, like these ideas:

  1. Wrapping paper: I just made the garland in the picture above with some wrinkled brown paper that came inside a box. Then I circled it with red ribbon, inserted file brass fasteners and tied some thyme springs. 
  2. Plastic bubble wrap: Let your kids spend some of their energy jumping on a bubble wrap hopscotch
  3. Corrugated cardboard: Make a fun job chart for the kids
  4. Cardboard tubes: This ball maze could keep Mark happy for hours, he loves balls! 
  5. Cardboard boxes: What about throwing an entire party of cardboard boxes!! Great for after moving!
  6. Newspaper: Create unique gift bags
  7. Egg cartons: Spend a snowy day making egg carton snowmen for your kids and a center piece for you
  8. Pizza boxes: From the table to the wall: pizza box art
  9. Plastic bottles: who said that mail should only go inside boxes and envelopes? Try to send inside a bottle!
  10. Styrofoam peanuts: Who knew you could use them for plants?
Read More

Let it snow

Monday, November 28, 2011


Not that much snow outside as we just enjoyed 65 degrees today. And yet with holiday season kicking in there is snow everywhere. In the decorations, gift wrappings, products boxes, holiday cards and pajamas. A while ago I read about using dried coconut as snow and when staring at my simple gift bags I had the idea of upgrading them with some fake snow. The variations are endless, and it is a lot of fun making these.

You will need a bottle of white school glue or anything similar, dried coconut (my version was finely grated without sugar), red ribbon and plain paper bags (these last two items I got at Target).

First you make your picture by placing your paper bag flat on a surface and squeezing the glue bottle letting a small stream of linear glue fall as you move it around forming your shape. If you want you may first draw it with a pencil but for simple designs, I find it easier just to do straight with the glue bottle. For the wreath I made two circles, one inside the other and with the tip of the glue bottle I spread glue in the area between the circles.

After you have draw your picture with the glue, sprinkle dried coconut on top of the areas where the glue is located. Right after that, lift it up on top of a plate and gently tap the paper bag to let anything that is not on top of the glue fall. You don't want to leave the coconut too long outside the glue area as it will taint the paper with its oil. Let it dry on a flat surface. (the coconut that fell off the bag can be used again for another project)

For the ribbon part, just cut your ribbon and glue it to the place you wish. You may also try with white sand instead of the coconut.
Read More

A last minute hostess gift

Wednesday, November 23, 2011

Just wrap a wine or apple cider bottle with thin wrapping paper (you can roll from one corner to another). Hold the top with an elastic band, cover with a lace and glue the label in place. Done! Free printables for the labels from here and here. (Thanks for Children Inspire Design blog for these free gifts). 
Well, wish I had more time for a longer post, but it is getting late and the Turkey awaits!! Hope you have a great Thanksgiving!

Read More

DIY: Fall leaves

Tuesday, November 22, 2011

Fall leaves are everywhere spread on the ground. Silently staring at me as I walk around town. Am I going to rescue them before they disappear? Am I going to bring them home and spread their beauty around captured inside my DIY craft projects? Very tempting to kidnap Fall's beauty so I can privately sip of it a little longer.

Last week I gave in and rescued a few leaves. On Saturday I made a little DYI birthday card with one of them for Luke's friend that was having a princess birthday party. What about you, do you take advantage of the abundance of leaves in the Fall to create interesting crafts?

Well, here is the lucky one:


And here are some pictures of Hoboken that I took on our walk back from the birthday party:


Read More

Bowling Party

Thursday, November 17, 2011

When I was a child my mom would make a cute and simple cake and some sweets. My friends would bring gifts wrapped in thin wrapping paper, and we would run around playing hide and seek until it was time to blow the candles and eat the cake. That was it, simple and fun. 

Last month, as I started searching online for bowling party theme ideas for Luke, I became aware of a complete line of knowledge that transforms a few years of life celebration into a wedding style party! I was overwhelmed by so many tutorials, crafts, decorations, printables and themes. They all looked gorgeous, but I felt as if I had missed the party planning class in school; a very essential life skill. So I decided to change that. Not going crazy, I started to dip my feet into this new line of knowledge for the fun of it.

I did not want to pursue the perfect party, however I was intrigued by the challenge of creating something new, like in art class. Could I, an illiterate in party planning, squeeze out of my brain a few ideas? I have to say I copied a lot of things, but somewhere along the way I felt good about creating something out of nothing. And if that counts, then I would say it was a successful start.

For the party favors I got this vintage camera printable on Etsy and after printing, glued to a card stock paper. Next, I rolled it and tied with a red ribbon. Then I printed a picture of the vintage camera and stapled it with an instructions note (something like this: go to Spotify.com and select a song, make a cup of hot chocolate - I placed a hot chocolate mix package inside each roll -, and assemble the camera). The thank you note card flags are made by cutting the rubber of the back of a pencil into a triangle shape and using it as a stamp (another idea I saw in another blog, wish I had taken notes where it was)


I also carved a pumpkin and 3 holes and painted it black to look like a bowling ball. Inside I placed the cake pops that I made out of a yellow cake mix with fresh cranberries. You can find cake pops recipes all over the Internet.


The T-shirt I painted first using the freezer paper technique, but because it bled a lot I had to fix it by hand after. So here it is, a few ideas to share.


Read More